"从今天起(2016.1.28),我将仿做一个微信,不过因为只有晚上能写点自己的东西,所以进度可能不快,请大家谅解!:"

今天的任务:
- 创建工程
- 搭起框架
一、创建工程
基本的创建这就不讲了,只讲一个项目创建工程之后你要做什么。
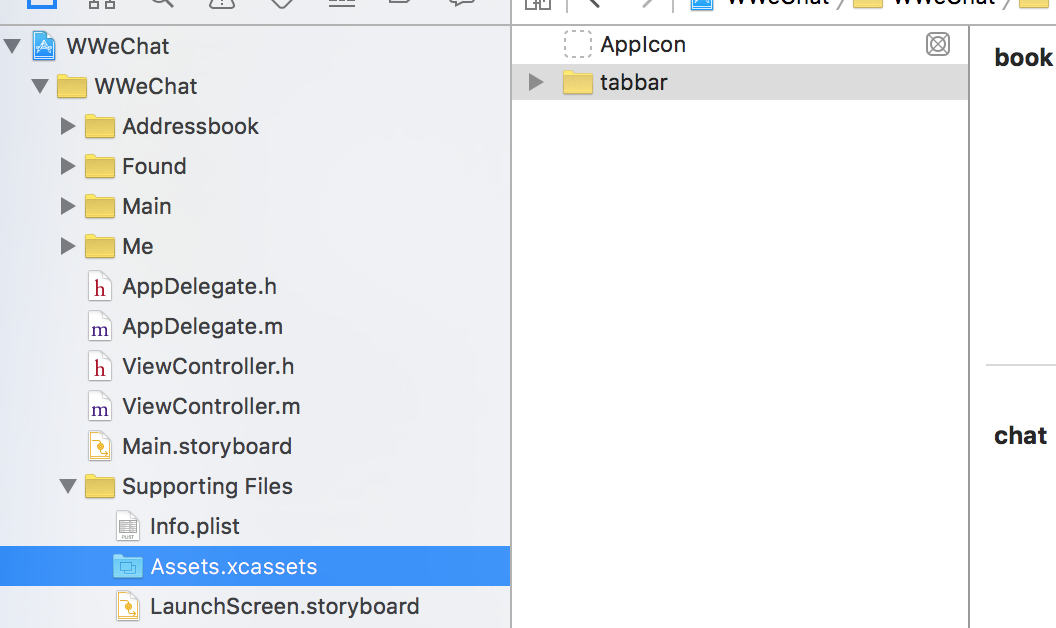
- 首先你需要把不需要的东西拖入Supporting Files
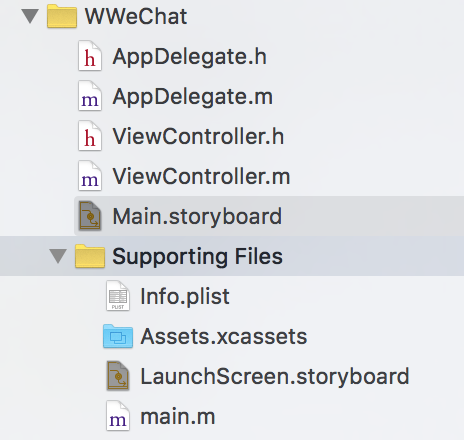 /
/
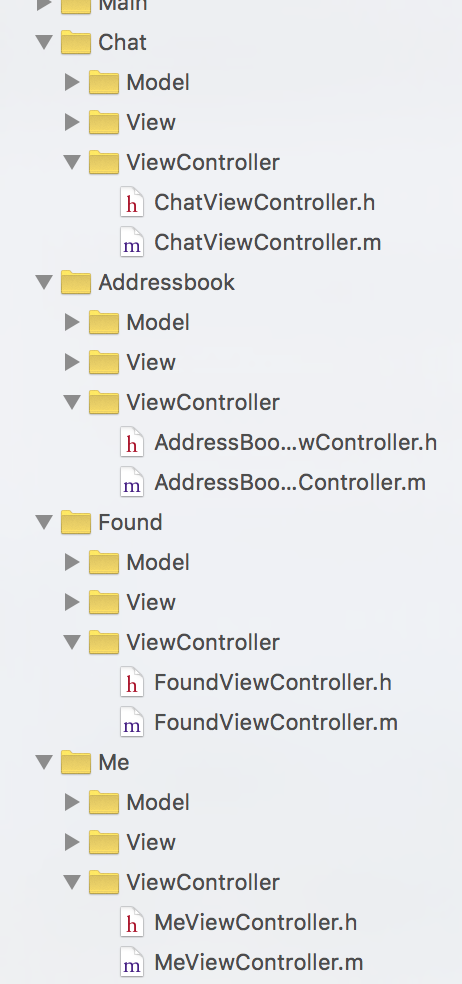
- 然后创建文件夹,
Show In Finder,在工程中按每个功能块创建文件夹,然后每个功能块文件夹中再创建Model、View、ViewController文件夹.
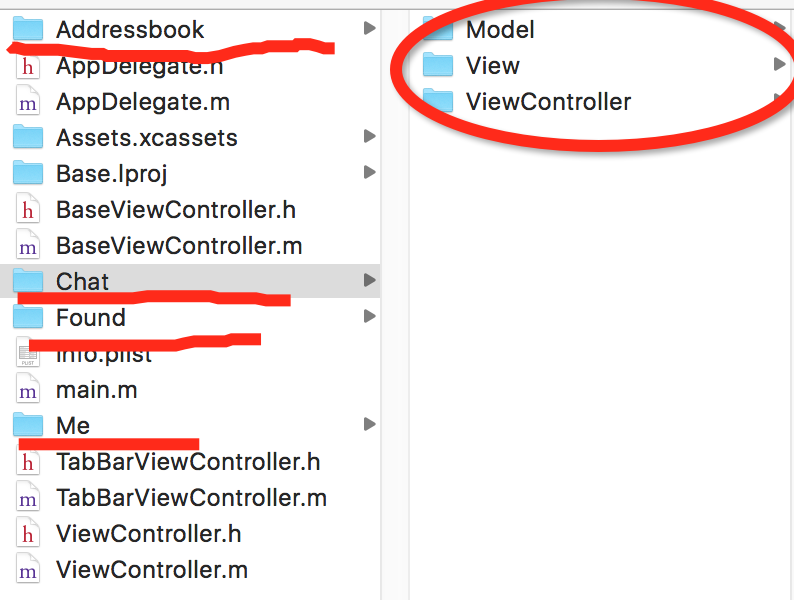
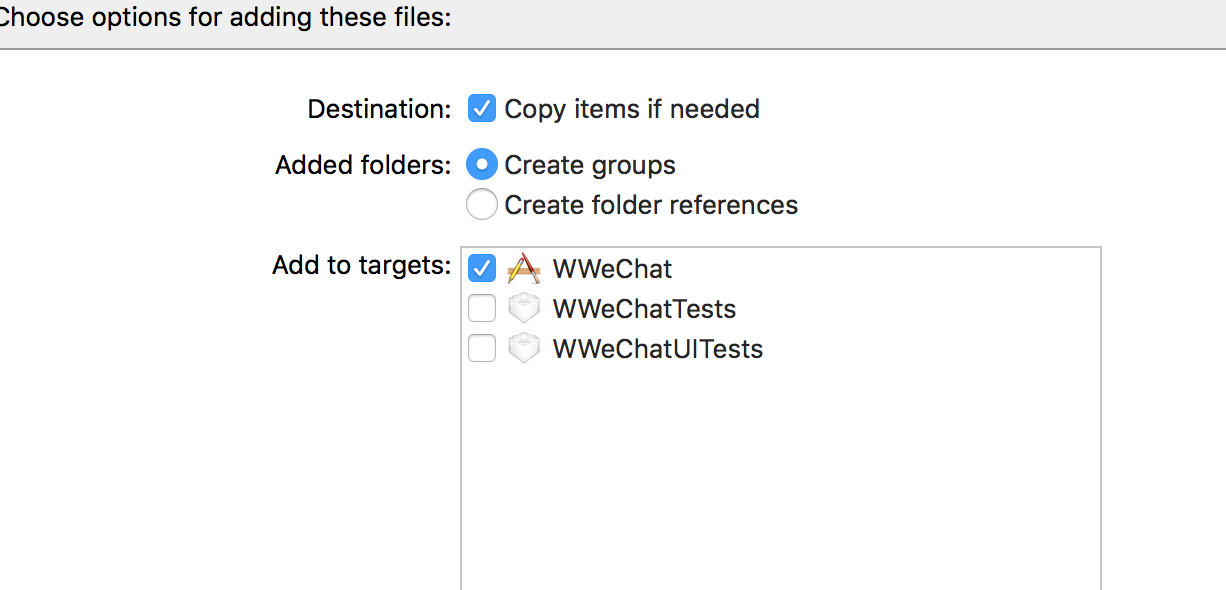
- 把文件夹加入工程
把图片拖入Assets.xcassets(我这些图是自己截的…如果谁有原图能够发我,感激不尽!)
现在,创建工程部分就算做完了(如果你有建议欢迎评论!)
二、搭框架
创建一个父类BaseViewController,方便全局修改所有的VC.
在今天,这个父类中只需要修改状态栏字体颜色
/**
*  修改状态栏字体颜色成白色
*/
- (UIStatusBarStyle)preferredStatusBarStyle
{
    return UIStatusBarStyleLightContent;
}- 在每个功能块的ViewController文件夹中分别以BaseViewController为父类创建一个VC
- 创建一个UITabBarController
//导入VC头文件
#import "AddressBookViewController.h"
#import "FoundViewController.h"
#import "ChatViewController.h"
#import "MeViewController.h"
- (void)viewDidLoad {
[super viewDidLoad];
ChatViewController * chatVC = [[ChatViewController alloc]init];
chatVC.title = @"微信";
AddressBookViewController * addbkVC = [[AddressBookViewController alloc]init];
addbkVC.title = @"通讯录";
FoundViewController * foundVC = [[FoundViewController alloc]init];
foundVC.title = @"发现";
MeViewController * meVC = [[MeViewController alloc]init];
meVC.title = @"我";
self.viewControllers = @[[self giveMeNavWithVC:chatVC andImgName:@"tabbar_chat_no" andSelectImgName:@"tabbar_chat_yes"],[self giveMeNavWithVC:addbkVC andImgName:@"tabbar_book_no" andSelectImgName:@"tabbar_book_yes"],[self giveMeNavWithVC:foundVC andImgName:@"tabbar_found_no"andSelectImgName:@"tabbar_found_yes"],[self giveMeNavWithVC:meVC andImgName:@"tabbar_me_no"andSelectImgName:@"tabbar_me_yes"]];
self.tabBar.tintColor = [UIColor colorWithRed:9/255.0 green:187/255.0 blue:7/255.0 alpha:1];
}
/**
* 返回取消渲染的image
*/
- (UIImage *)removeRendering:(NSString *)imageName
{
UIImage * image = [UIImage imageNamed:imageName];
return [image imageWithRenderingMode:UIImageRenderingModeAlwaysOriginal];
}
/**
* 快速创建Nav
*/
- (UINavigationController *)giveMeNavWithVC:(UIViewController *)VC andImgName:(NSString *)imgName andSelectImgName:(NSString *)selectImgName
{
UINavigationController * nav = [[UINavigationController alloc]initWithRootViewController:VC];
nav.tabBarItem = [[UITabBarItem alloc]initWithTitle:VC.title image:[self removeRendering:imgName] selectedImage:[self removeRendering:selectImgName]];
return nav;
}适当创建方法能节省不少代码
在AppDelegate.m中增加一些代码
- (BOOL)application:(UIApplication *)application didFinishLaunchingWithOptions:(NSDictionary *)launchOptions {

    self.window.bounds = [UIScreen mainScreen].bounds;

    self.window.backgroundColor = [UIColor whiteColor];

    [self.window makeKeyAndVisible];

    self.window.rootViewController = [[TabBarViewController alloc]init];

    [self changeNav];

    return YES;
}

/**
*  全局改变Nav
*/
- (void)changeNav
{
    //设置NavigationBar背景颜色
    [[UINavigationBar appearance] setBarTintColor:[UIColor colorWithRed:54/255.0 green:53/255.0 blue:58/255.0 alpha:1]];
    //@{}代表Dictionary
    [[UINavigationBar appearance] setTitleTextAttributes:@{NSForegroundColorAttributeName:[UIColor whiteColor]}];
    //不设置这个无法修改状态栏字体颜色
    [[UINavigationBar appearance] setBarStyle:UIBarStyleBlack];
}
现在运行一下
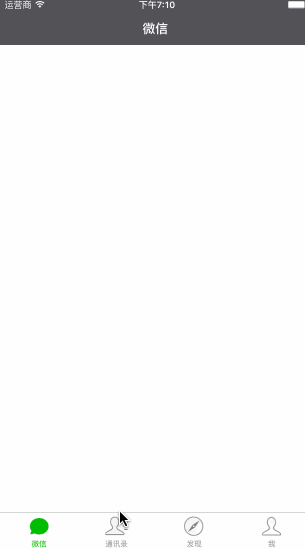
好了今天就做到这了!明天将创建基本的UI.
目前的代码(将持续更新直至完成)
GitHub:WzxJiang
如果你有建议或者疑问欢迎评论!
好文推荐:iOS开发之详解连连支付集成