
Process notes contents
This greenhouse café uses just six colours. A purple foundation peeks out beneath an amber platform; a white front meets a green side wall, with three blue panes running along the roof slope. Four white paving stones sit outside the entrance, with a pointed plant on either side. That is where I left the picture.
The work was made with a local VectorPaint build, 1.0.7 (6), in an iPhone Duo / iOS 27.1 simulator, on a 1080 × 1080 px canvas. The final editable original retains one layer, 29 closed paths and 109 anchor points.
Creation disclosure: AI assisted operation of the real VectorPaint editor, using touch, keyboard and accessibility interactions for pen points, object selection, fills and geometry adjustments. The finished image was exported as PNG by the app itself. No externally composited image was imported, and artwork data was not written directly into the app. The video follows creation order, removes waiting and keeps the real app interface visible so each operation is easier to follow.
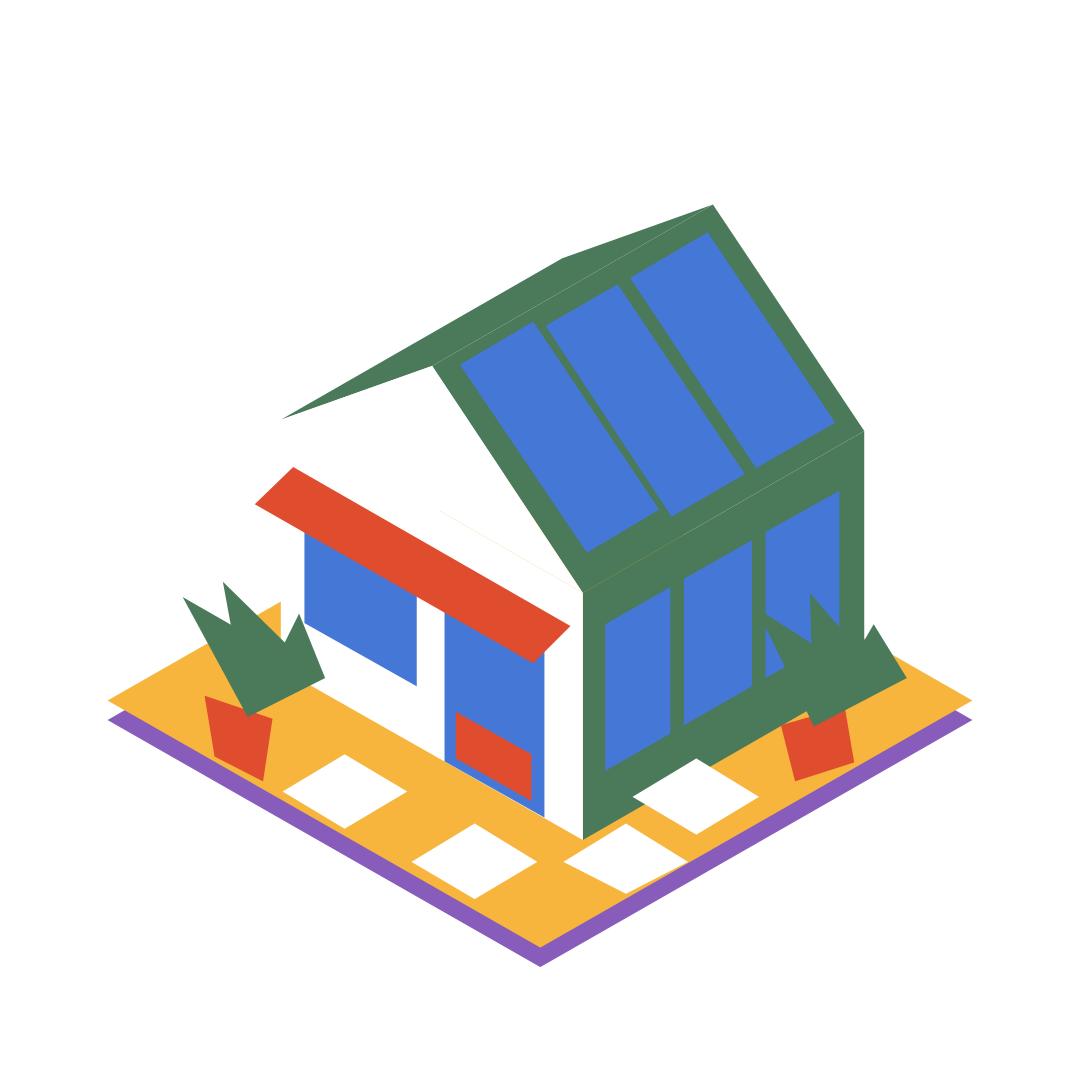
Map out the 29 colour shapes
The whole picture uses flat colours with strokes disabled. These are the objects retained at the end; deleted trial lines are excluded.
| Content | Paths | Role |
|---|---|---|
| Purple foundation and amber platform | 2 | A thick base beneath the building |
| Two walls, two roof planes and white gable | 5 | The building’s main volume |
| Blue roof panes | 3 | Divisions following one roof slope |
| Front window, door glazing and three side windows | 5 | Glazing set into its respective walls |
| Terracotta awning and lower door panel | 2 | Warm-coloured elements on the front |
| Terracotta plant pots | 2 | Support for the left and right foliage |
| Large triangular leaves | 6 | Three per pot, pointing in different directions |
| White diamond paving stones | 4 | Open ground in front of the entrance and to either side |
| Total | 29 | All closed paths |
This session uses one layer, with objects stacked in drawing order. The walls, glass, awning and plants remain separate objects, selectable through the layer panel’s object tree.
Start with a square canvas and disable strokes
Create a 1080 × 1080 px document. This work is named “温室咖啡馆_Duo_20261024”. Leave white space around it, keeping the platform’s left and right corners away from the canvas edges.
Select the pen, place a point at each turn of the outline, then return to the starting point to close it. After a shape is finished, switch to selection, select the new object and open Object Properties → Appearance. Set its fill and turn off Enable Stroke. The later flat-colour shapes follow the same process.
Fills come from the app’s favourite palette. Confirm that a colour applies to fill before choosing it. There are no gradients here; adjoining green, white and blue shapes do most of the work of explaining walls and glass.
| Favourite colour | HEX | Use in this piece |
|---|---|---|
| Purple | #875CBA | Lower edge of the foundation |
| Amber | #F7B53D | Top of the platform |
| Moss green | #4A7A59 | Side wall, roof and leaves |
| Blue | #4578D6 | Roof panes, windows and door glazing |
| White | #FFFFFF | Front wall, gable and paving stones |
| Terracotta | #E04C2E | Awning, lower door panel and both pots |
Offset two platform diamonds by about 20 px
Draw the purple diamond first, then the amber diamond above it. The upper shape’s corners are approximately (108, 700) on the left, (540, 948) at the bottom, (972, 700) on the right and (540, 453) at the top. These composition references use the canvas’s upper-left corner as the origin, with values increasing rightwards and downwards.
The purple base is offset downwards by about 20 px, showing beneath the amber edge to give the platform thickness. Close each shape with four corners, without adding extra nodes along its long straight edges.
The building follows the platform’s two families of sloping edges, while the wall edges remain vertical. The glass and paving stones reuse these directions later, rather than establishing a new angle for each detail.
Build the green planes before adding the white front
The large shapes were made in this order: green side wall, two green roof planes, then the white front wall and gable above it. The front and side share the central corner, with the ridge extending up-right from the nearer gable tip.
The white front shares the background’s colour, with the green side, blue glazing and terracotta awning defining its extent. Keep the gable a clear triangle, its sloping edges meeting the pitched roof.
These large planes are five objects in total. Make the walls meet the platform and join at the same vertical corner before adding glass. Later glazing should not be used to conceal an already misaligned wall edge.
Add three roof panes, two front panes and three side windows
The three blue roof panes all sit on the same green slope. Each is a quadrilateral following the directions of the ridge and eaves. The green base shows through the gaps as a fairly wide frame, without many separately drawn thin strips.
The front has a shorter window and a taller glazed door. Their top and bottom edges follow the slope of the white wall, while their sides remain vertical. A terracotta lower panel overlaps the door glazing, sharing the awning and pots’ colour.
Three blue windows run along the green side wall. Their positions follow the wall, leaving green between each pane. This makes front, side and roof easy to distinguish without adding reflections to the glass.
One blue roof path looked like a filled surface during editing but was still open when the original was checked. The actual correction was to select it in the object tree, delete it normally, then use the pen to rebuild a closed quadrilateral and fill it blue. All three final roof panes are closed.
Span the front glazing with one sloping awning
The terracotta awning runs above the front window and door as a sloping quadrilateral projecting down-left. Place its wall-side edge along the front wall’s direction, extend the outer two corners, then close and fill it terracotta.
Let its ends extend slightly past the glazing, so it projects in front of the white wall. Leave blue door glass between the awning and the lower panel, keeping the door from becoming entirely red.
Replace troublesome small leaves with three large triangles per pot
While making small shapes in the partially open view, nodes repeatedly became too close and paths ended early. The original leaf outline called for more turns, but the points were crowded together and difficult to close. The practical response was to return to the fully open view at about 56% and replace each cluster with three larger triangles.
Each triangle keeps only three corners: an outward tip, a spreading side corner and a lower point extending into the top of the pot. The left cluster opens towards the upper left, upwards and upper right; the right cluster also uses three tips with different orientations. All are moss green, for six objects in total.
The decision here was to enlarge the silhouette instead of retaining small, awkward outlines. Three overlapping leaves still provide differences in height and direction, and remain readable as a plant at a smaller size.
Correct the pots in Geometry by changing only Y
Both pots are terracotta quadrilaterals, wider above and narrower below. Once the foliage was drawn, the connection between pots and leaf roots needed adjustment. In this session, each pot was selected through Layer Panel → Object Tree, then Object Properties → Property Category → Geometry, with the position reference set to the upper left.
Keep horizontal position and size unchanged, editing only Y. The left pot moved from 782.07 to 695.67, upwards by 86.4 px. The right moved from 755.47 to 706.87, upwards by 48.6 px. After entering the value, choose Apply Position and Size to bring the pot body under the leaf ends.
This moves an existing object without redrawing it. Where several nearby objects share a colour, choosing precisely through the object tree and checking the current properties helps avoid moving the awning or door panel by mistake.
Leave enough space between the paving-stone nodes
The paving stones were drawn last as white diamonds, each about 125 px wide and 75 px high. Place the left, top, right and bottom corners, then return to the start to close. The four stones sit on open ground around the entrance, with sloping edges close to the platform’s directions.
They were made larger than in the initial small sketch, so their corners could be distinguished on screen and closed more reliably. They are four independent, selectable white surfaces, rather than decorative outlines made from rotated rectangles.
Remove trial paths, save and export the full canvas
During creation, zero-area short lines and open trials were removed through the object tree. When a small path fails, check more than its colour: confirm that it is the complete shape you intended.
Save the editable original, then use Share → PNG → Full Canvas → 1× → White Background → Export PNG. The image on this page is the app’s actual 1080 × 1080 px PNG, without repainting outside the app. The original is retained separately so that individual panes, leaves or stones can be selected and edited later.
After this PNG export, one final two-node trial with no visible area and no stroke was deleted. There was no visible change to the image; the final saved original retains 29 closed paths.
Compare four Duo poses through actual window samples
After completion, the device was actually switched through Open → Partially Open → Closed → Open, with a device-window capture at each stage. The partially open view shows the embedded layer and object tree below; the closed state uses a more compact landscape layout, before returning to the open view.
This section uses stable window samples after actual pose changes, edited as steps. Switching included black screens and waiting, so it is not described as continuous hinge-motion footage. The pose changes the editing viewport; the original retains 1080 × 1080 px and the same objects.
To practise the operations, see pen paths and curves, fills and strokes and the isometric box exercise. For the different purposes of PNG and an editable original, see choosing export formats.